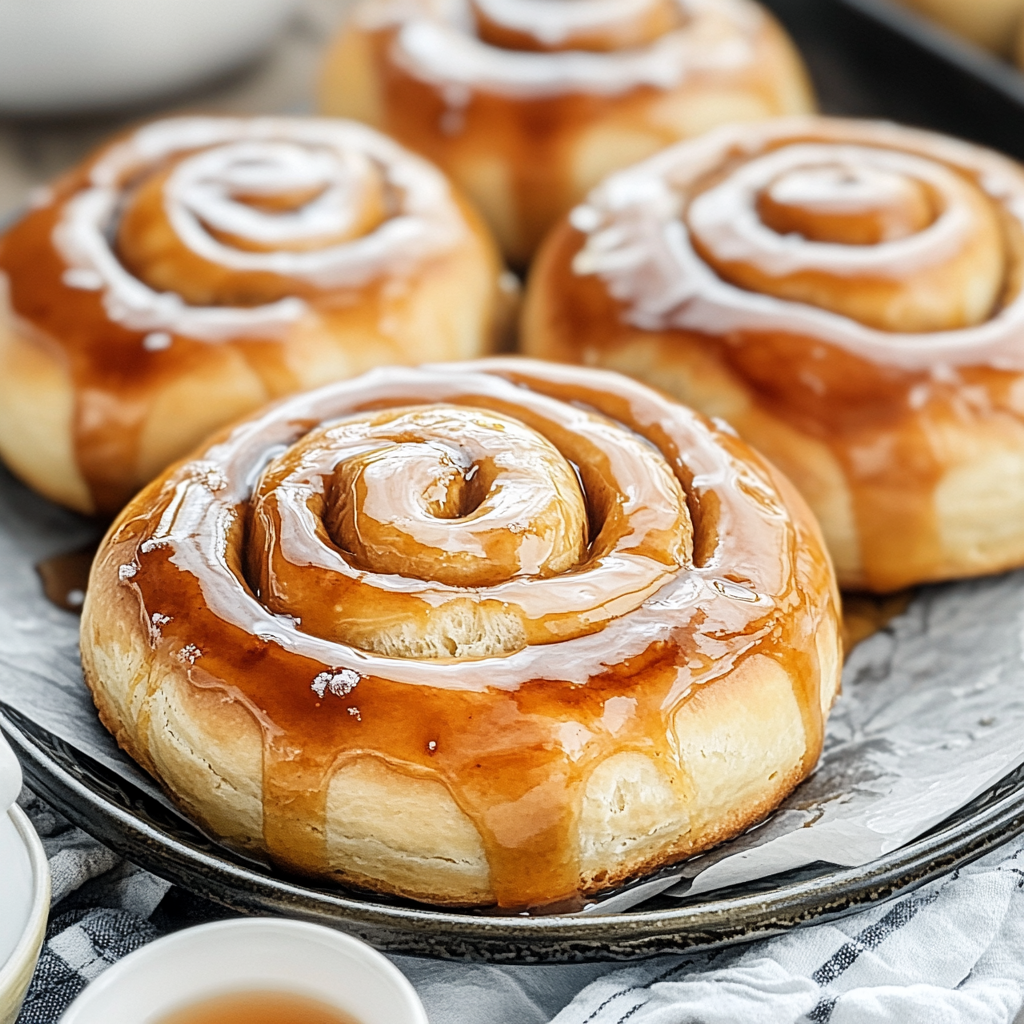
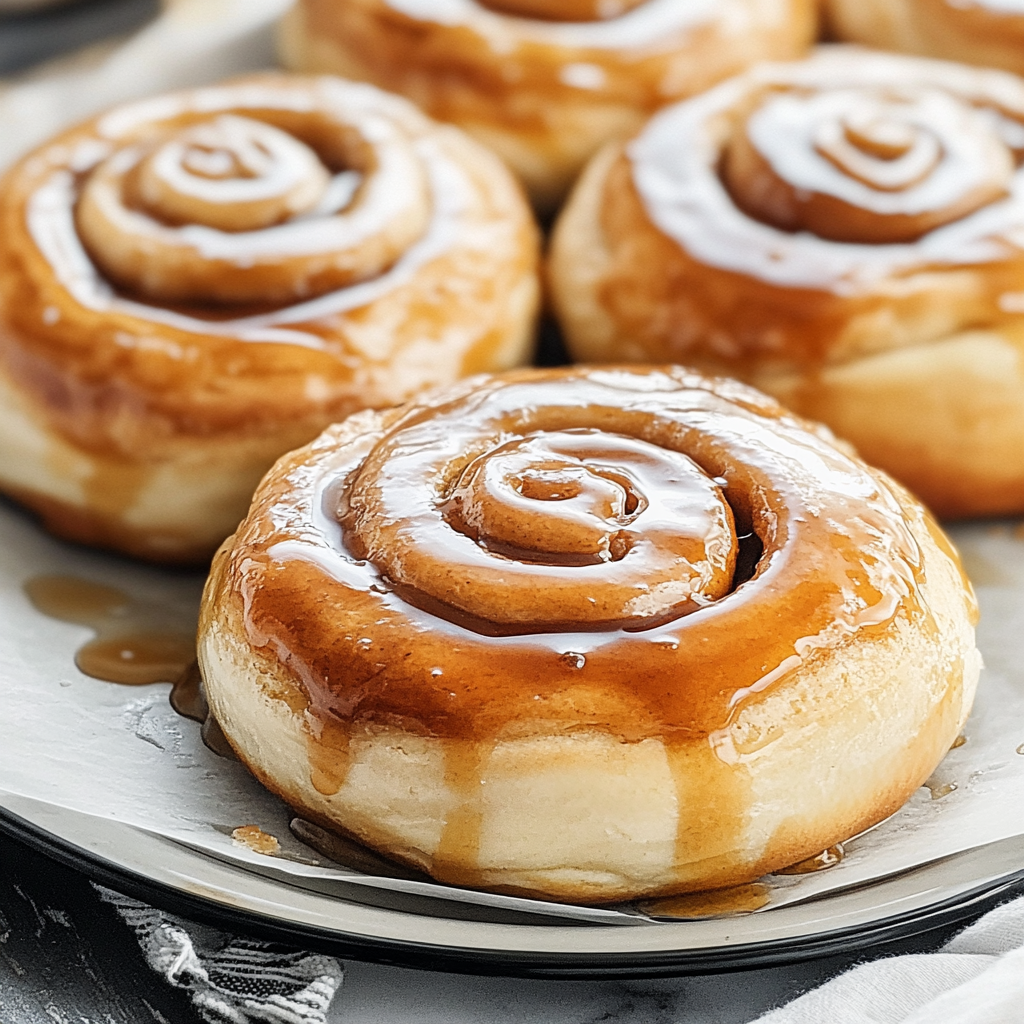
There’s something undeniably cozy about the smell of freshly baked Homemade Honey Buns wafting through your home, wrapping you in a warm embrace. Picture this: soft, pillowy buns glistening with a sweet honey glaze that beckons you to take just one more bite. These delightful treats are perfect for breakfast, brunch, or any time you’re feeling a little indulgent.
I still remember the first time I attempted to make these luscious buns. I was a novice in the kitchen, armed only with a whisk and an ambitious spirit. My family gathered around, eagerly waiting as the aroma filled our home. Little did we know that we were about to embark on a deliciously sticky adventure that would lead to smiles all around and some very sticky fingers.
Why You'll Love This Recipe
- These Homemade Honey Buns are easy to whip up, making them perfect for any skill level
- The sweet honey glaze adds an irresistible flavor that everyone loves
- Visually stunning and golden brown, they become the star of any brunch table
- Enjoy them warm or cold; they’re versatile enough for breakfast or dessert!
Ingredients for Homemade Honey Buns
Here’s what you’ll need to make this delicious dish:
-
All-Purpose Flour: Essential for creating that soft texture; make sure it’s fresh for best results.
-
Active Dry Yeast: This is what gives your buns their delightful rise; ensure it’s within its expiration date.
-
Milk: Warm milk helps activate the yeast; opt for whole milk for a richer flavor.
-
Sugar: Granulated sugar sweetens the dough and enhances browning during baking.
-
Butter: Melted butter adds richness; use unsalted so you can control the saltiness.
-
Eggs: Eggs enrich the dough with moisture and create that tender crumb.
For the Glaze:
-
Honey: The star of our glaze; use pure honey for maximum flavor impact.
-
Powdered Sugar: This makes your glaze sweet and perfectly smooth; sift it for clump-free results.
-
Vanilla Extract: A splash of vanilla adds depth to your glaze; choose pure extract for best results.
The full ingredients list, including measurements, is provided in the recipe card directly below.
How to Make Homemade Honey Buns
The Yeast Activation Phase: Start by warming up your milk until it’s just lukewarm—like a soothing bath but not too hot. Pour this into a bowl, sprinkle in your active dry yeast along with a teaspoon of sugar. Let it sit for about five minutes until foamy like morning cappuccino foam.
The Dough Making Phase: In another large bowl, combine flour, remaining sugar, melted butter, eggs, and your frothy yeast mixture. Stir until everything starts coming together into a shaggy dough—this part might feel like rolling playdough but trust me; it’s going somewhere gooey good!
Kneading Time!: Once combined, turn out your dough onto a floured surface and knead it like you mean it—about eight minutes should do. You’re aiming for smooth and elastic dough that springs back when poked—if you poke it and it sulks, keep kneading!
The First Rise: Place your dough in a greased bowl covered with a damp cloth. Let it rise in a warm spot until doubled in size—this usually takes about an hour but could be more if it’s chilly (just like me on winter mornings).
Shaping Your Buns: After rising, punch down that dough gently (yes, really!). Divide it into equal portions and shape each piece into cute little balls. Arrange them snugly in a greased baking dish—think of them as friends huddling together on a cold day.
The Second Rise: Cover those little beauties again with a cloth and let them rise for another thirty minutes until puffy like marshmallows on hot cocoa.
Baking Time!: Preheat your oven to 350°F (175°C). Bake those buns for about twenty minutes or until they’re golden brown and gorgeous—don’t forget to peek through the oven door like an excited child!
The Sweet Glazing Phase: While they bake, mix together honey, powdered sugar, and vanilla extract in a small bowl until smooth. Once your buns emerge from the oven looking heavenly, drizzle that glorious glaze over them while they’re still warm—it’ll soak right in!
Now sit back and watch as everyone dives into these delectable Homemade Honey Buns! You’ll have happy faces all around—and maybe even some requests for seconds (or thirds). Enjoy!
You Must Know
- Homemade honey buns are not just a treat; they bring warmth and joy to any gathering
- Their soft, sweet aroma fills the house, making everyone eager for a taste
- These buns are perfect for breakfast or as an afternoon snack
Perfecting the Cooking Process
To achieve perfect homemade honey buns, start by preparing your dough. Let it rise while you mix the filling. Bake them in a preheated oven to ensure even cooking and optimal fluffiness.
Add Your Touch
Feel free to customize your homemade honey buns with different fillings like chocolate chips, nuts, or dried fruits. You can also experiment with flavored glazes like vanilla or almond for a delightful twist.
Storing & Reheating
Store your homemade honey buns in an airtight container at room temperature for up to two days. For longer storage, freeze them individually. Reheat in the microwave for a few seconds for that fresh-out-of-the-oven taste.
Chef's Helpful Tips
- To make your homemade honey buns truly exceptional, always use fresh yeast to ensure they rise perfectly
- Avoid over-kneading the dough; it should be soft and slightly sticky
- Lastly, let them cool completely before glazing to prevent melting
The first time I made homemade honey buns, my family devoured them within minutes! The delighted smiles on their faces were worth every minute spent in the kitchen.
FAQs :
What are Homemade Honey Buns?
Homemade honey buns are soft, sweet pastries made from a rich dough infused with honey. These delightful treats often feature a cinnamon filling and are drizzled with a sugary glaze. Perfect for breakfast or as a snack, homemade honey buns can be easily customized with various toppings or fillings to suit your taste. They bring warmth and comfort to any kitchen and are a favorite among families.
How do I store Homemade Honey Buns?
To keep your homemade honey buns fresh, store them in an airtight container at room temperature for up to three days. If you want to extend their shelf life, consider freezing them. Wrap each bun tightly in plastic wrap and place them in a freezer-safe bag. When ready to enjoy, simply thaw them at room temperature or warm them briefly in the oven.
Can I make Homemade Honey Buns ahead of time?
Yes, you can make homemade honey buns ahead of time. Prepare the dough and shape the buns, then place them in the fridge overnight before baking. This method allows the flavors to develop further. Alternatively, bake your honey buns and store them in an airtight container until you’re ready to serve, ensuring they stay moist and delicious.
What variations can I try with Homemade Honey Buns?
You can experiment with various flavors when making homemade honey buns. Consider adding chocolate chips or dried fruit like cranberries or raisins into the dough. For a festive touch, incorporate spices such as nutmeg or cardamom into the cinnamon filling. You can also top your buns with cream cheese frosting instead of glaze for a richer flavor experience.
Conclusion for Homemade Honey Buns :
In summary, homemade honey buns are a delightful treat that combines sweetness and comfort in every bite. With simple ingredients and easy preparation steps, you can create these delicious pastries right in your kitchen. Whether enjoyed warm out of the oven or stored for later, they offer versatility through various flavor options. Embrace the joy of baking by trying your hand at these delightful honey-infused treats today!
Homemade Honey Buns
- Total Time: 40 minutes
- Yield: Approximately 12 servings 1x
Description
Homemade Honey Buns are a delightful treat that fills your kitchen with warmth and sweetness. These soft, pillowy pastries are drizzled with a luscious honey glaze, making them perfect for breakfast, brunch, or dessert. Easy to prepare, they are sure to impress family and friends with their irresistible flavor and beautiful golden-brown appearance.
Ingredients
- 4 cups all-purpose flour
- 2 1/4 tsp active dry yeast
- 1 cup whole milk (warm)
- 1/2 cup granulated sugar
- 1/4 cup unsalted butter (melted)
- 2 large eggs
- 1/2 cup honey
- 1 cup powdered sugar (sifted)
- 1 tsp vanilla extract
Instructions
- 1. Activate Yeast: Warm the milk until lukewarm, then mix in yeast and a teaspoon of sugar. Let sit for 5 minutes until foamy.
- 2. Prepare Dough: In a large bowl, combine flour, remaining sugar, melted butter, eggs, and the yeast mixture. Stir until a shaggy dough forms.
- 3. Knead: Transfer dough to a floured surface and knead for about 8 minutes until smooth and elastic.
- 4. First Rise: Place dough in a greased bowl covered with a damp cloth and let rise in a warm spot until doubled in size (about 1 hour).
- 5. Shape Buns: Punch down the dough gently, divide into equal portions, shape into balls, and arrange in a greased baking dish.
- 6. Second Rise: Cover with a cloth and let rise for another 30 minutes.
- 7. Bake: Preheat oven to 350°F (175°C) and bake for about 20 minutes until golden brown.
- 8. Glaze: Mix honey, powdered sugar, and vanilla extract until smooth. Drizzle over warm buns before serving.
- Prep Time: 20 minutes
- Cook Time: 20 minutes
- Category: Dessert
- Method: Baking
Nutrition
- Serving Size: 1 serving
- Calories: 250
- Sugar: 12g
- Sodium: 150mg
- Fat: 6g
- Saturated Fat: 3g
- Unsaturated Fat: 2g
- Trans Fat: 0g
- Carbohydrates: 44g
- Fiber: 1g
- Protein: 5g
- Cholesterol: 40mg
Keywords: Customize your buns by adding chocolate chips or dried fruits. Experiment with flavored glazes like almond or lemon for added zest.
